 In this post, we will discuss fine tuning the Articulate Storyline’s screen recording feature, to the frame level, so as to easily customize our step-by-step learning mode. Before we dive deep, let us have a brief idea about Storyline’s recording feature.
For those who are in a hurry, and want to skip the basics, you can continue from the red flag [ ] icon.
Storyline has an excellent feature of screen recording. With its help we can easily create recorded illustration of our choice.These illustrations can be set on auto pilot (video on a single slide), or we can steer the learning progress as per our requirements (step-by-step slides).
The first mode (Video on a single slide) converts all the actions in a video. It’s just a simple illustration mode to which you can add some call outs.
However, the crux of the recording feature lies in the ‘Step-by-step slides’ mode. Let us discuss its three modes – View, Try, and Test modes in brief, before we wrap up the basics. With the help of this option you can show a process, step-by-step.
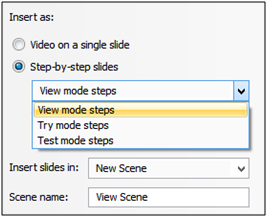 View Mode: If you just want the user to ‘see and learn’ the process step by step, then this is your mode of choice.
Try Mode: When you want an option where the learner gets a hands-on experience along with your explanations/ hints, you will find this mode most appropriate. Also, my favorite J.
Test Mode: In case you just want to check out the progress of the learner.
Here is an illustration for the same. [iframe_loader type=’iframe’ width=’100%’ height=’500′ frameborder=’0′ src=’http://blog.kawstov.com/wp-content/uploads/articulate_uploads/Screen_Recording_Modes/story.html’]

Let us continue with our previous example. For your reference, I have attached the file. From here, I will take reference of the attached file for a better explanation.
In its ‘Test Mode’ we see that the storyline has created interactivity, for every action that we performed. What if, we want to customize our actions that need to be performed, to pass the quiz? For this, we may need to tweak our recording, to include/ remove some of the frames. This is where ‘Action Fine Tuning’ comes into play.
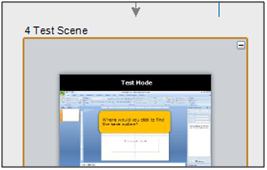
We’ll start by opening the ‘Test Scene’. Currently, it has the following interactivities:

Let’s just say we want to edit the above interactivity. And use ‘Action Fine Tuning’ to change the above interactivity, to the following –

The first screen of the updated file is just an introduction, and NOT interactivity.
Let us discuss how to do this; step-by-step (we will discuss basis illustrations from Storyline version 1).
A change, in how the clip ends on previous slide, will have an effect on the starting frame of the next slide. Since screencast interactivity can sometimes involve changes in multiple slides, it may go messy, without a plan. So, I encourage everyone to plan the complete series of intended interactivity in detail, beforehand. Broad areas to plan are –
Which slide will contain what interactivity?
What will happen to the current content of the screen?
Steps to modify the current content into desired on.
In our case, here is the plan:
Which slide will contain what?
The first screen will be an introduction
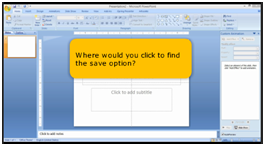
The second slide will contain a clip of ‘Office Menu’ opening up. Then a ‘Hotspot’ interactivity
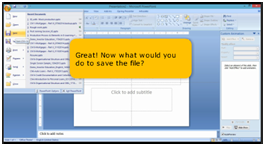
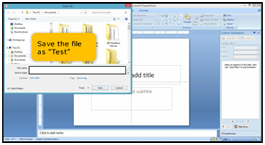
The third slide will contain a clip of ‘Save Window’ opening up
What will happen to the current content?
Slide 1 – Remove freeform. Remove the clip. Change in the text. Addition of button to move to next screen.
Slide 2 – Tweak the current clip ending to remove highlighting of ‘Save’ option. Remove the ‘Freeform’. Tweak Hotspot, to move to next slide when clicked. Change in the text.
Slide 3 – No change.
Steps to modify
Let’s jump to our Test Scene.
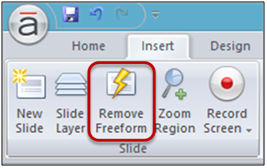
Slide 1 – Select the first slide, remove the ‘Freeform Interactivity’, and the video clip.
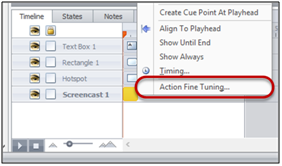
Slide 2 – Click the timeline section. You will see a ‘Screencast’ clip at the bottom of the timeline. Right Click and select ‘Action Fine Tuning’.
A pop up window will appear.
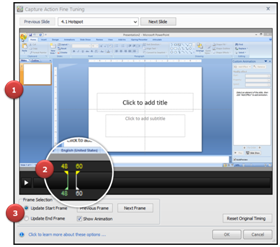
Key areas to get accustomed to, in this window, are –
1. Video area: You will see the updated output here, in real time.
2. Slider area: You will notice two sets of clippers here. First, the fixed set (yellow). The area between them is the part of the video that will be shown as a clip, when published. The second set (green and white) is movable and can be dragged to change where the updated clip should start and end.
3. Frame selection area: Where you can decide the start and end frame, with the precision of a single frame. Basis your selection of start/ end frame, the clippers in the slide turn green (active) or white (inactive).
We need to keep 2 things in mind, while modifying the clips.
All the clips are already recorded. It is just a matter of re-arranging the beginning and end of the recordings on every slide.
Every slide has complete recording embedded into it. It’s just only the relevant part is unhidden as a short clip, on every slide. Hence every slide has only a short action covered.
Keeping this in mind, select the ‘Update End Frame’ option; and drag the ending clip to 87. Similarly, update the starting frame to 19.
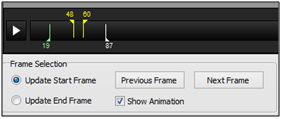
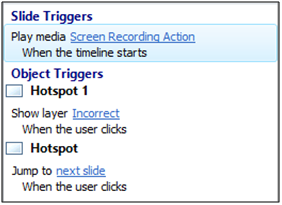
In case you are having problem selecting the precise frame number by mouse, use ‘Previous/ Next Frame’ buttons. Then select ‘OK’. Adjust the hotspot area, to ‘Save’ option. Create a trigger to play the clip when the timeline on the slide starts. You can also create a hotspot/trigger/ layer for incorrect answer as well.
Slide 3 – No change.
And we are done! So we see that with a little planning, and action fine tuning, we customized the screen recording and interactivity. Here is the output file for your reference.
Do tell me, how YOU used it. Cheers!
PS: This is not the best approach for fine tuning. However I chose it to cover the maximum actions that can be performed.